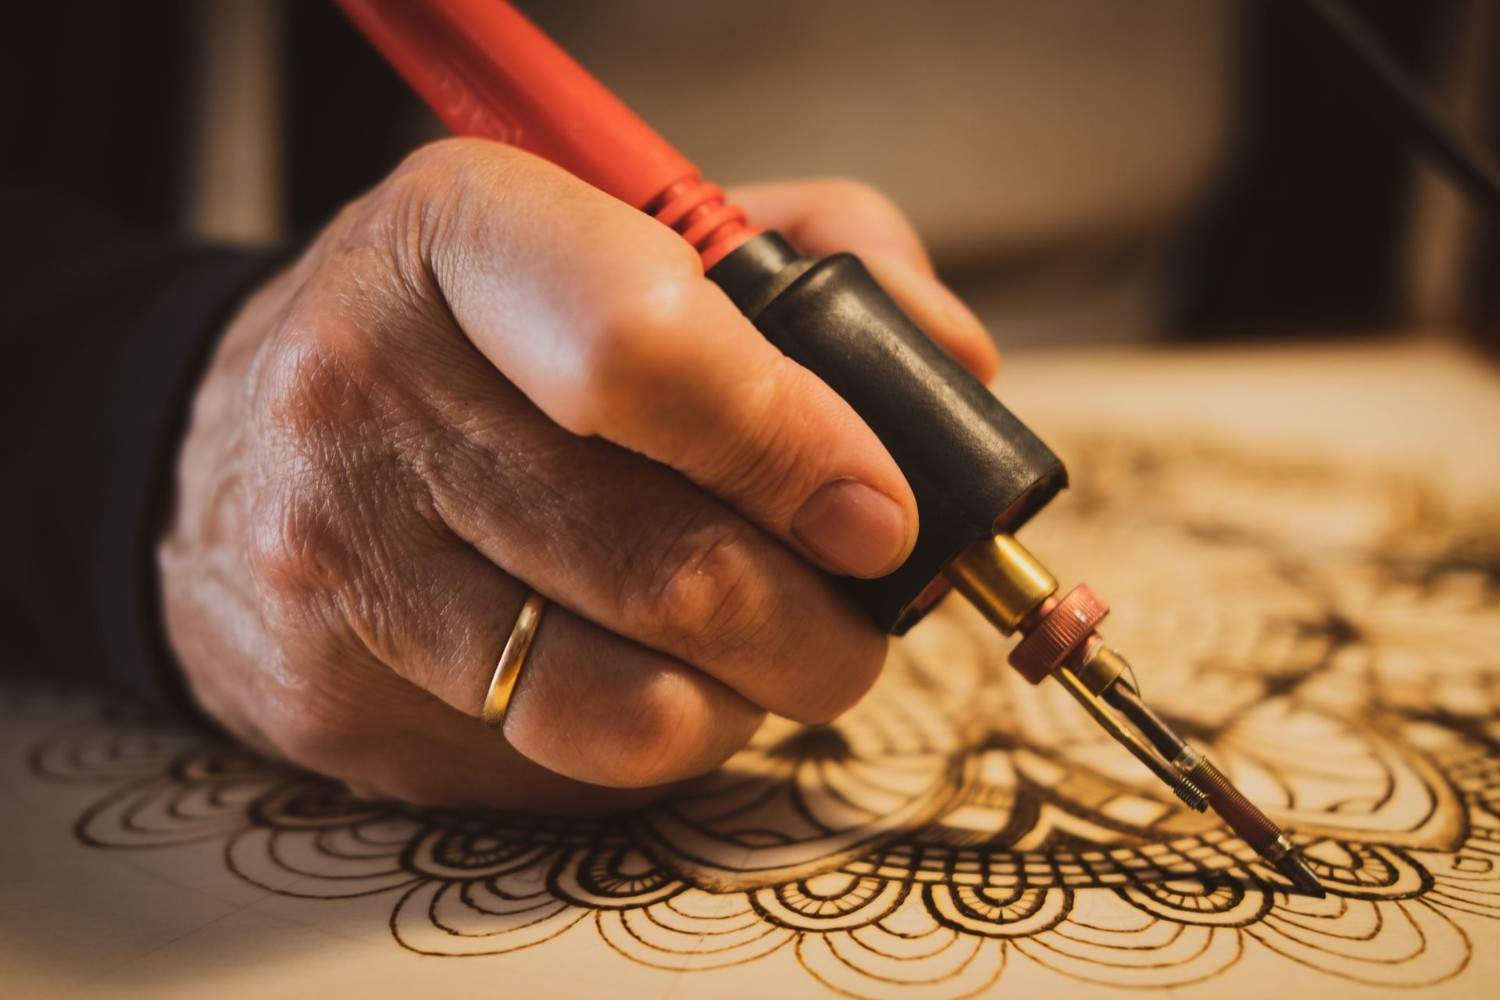
Woodburning, or pyrography, is an artwork that involves using a heated tool to burn designs onto wood. The manner is simple yet offers infinite possibilities for creativity. Whether you’re a beginner trying to discover this craft or a skilled artist, a good woodburning tip could make all the distinction. This manual will cover the whole lot you need to know about woodburning kits, from deciding on the right one to gaining knowledge of primary techniques and the usage of it efficaciously.
What is a Woodburning Kit?
A woodburning kit consists of several tools and accessories designed to help you create detailed designs on wood surfaces. The primary device in a tip is usually a woodburning pen, which generates warmth to burn the wooden surface. Kits can also include numerous pointers, stencils, and commands for novices.
Woodburning has been around for hundreds of years and is now enjoying a resurgence in recognition. It offers a unique way to create stunning designs, from complex styles to personalized presents. The high-quality woodburning kits come with everything you need to begin, making it easier for novices to dive into this worthwhile interest.
Key Components of a Woodburning Kit
A traditional woodburning includes the following additives:
Woodburning Pen
The pen is the main device inside the package. It heats up and lets you burn designs onto the wood.
Interchangeable Tips
These recommendations come in various styles and sizes, allowing you to create different types of designs, from best traces to shading.
Temperature Control
Some advanced kits have adjustable temperature settings, which provide you extra control over the burning technique.
Woodburning Surface
While wood is the maximum commonplace surface used, some kits may also encompass practice boards or portions of wood.
Safety Equipment
Woodburning tools generate loads of warmth, so kits often come with safety gloves and pointers for preventing burns.
Instruction Manual
Many kits consist of publications and mission thoughts for novices to assist them get started.
How to Choose the Right Woodburning Kit
When choosing a woodburning kit, you need to keep in mind numerous elements to make certain it fits your ability stage and creative dreams. Here are a few matters to keep in mind:
Skill Level
If you’re a beginner, search for a tip that has a smooth-to-use woodburning pen and clear instructions. Some kits even include online tutorials or undertaking thoughts that will help you get started. If you have got some revel in, you might prefer a superior kit with interchangeable pointers, adjustable temperature controls, and greater features.
Types of Tips
The types of tips protected inside the tip can affect the level of detail you can attain. Beginners might benefit from a tip with several recommendations for one-of-a-kind outcomes, such as nice tips for detailing or wider guidelines for shading. Advanced customers might also need to explore kits with specialized pointers for even more difficult designs.
Temperature Control
Temperature control is critical for extraordinary woodburning effects. Beginners may not need an adjustable temperature, but if you’re trying to test with different strategies, a tip with adjustable temperature settings can be best.
Wood Type
Different wood kinds can burn differently, so you’ll need to ensure that your tip works properly with the type of wood you propose to use. Softwoods like pine are easy to burn and first-rate for beginners, while hardwoods like Alright or Maple are more difficult and might require better temperatures.
Budget
Woodburning kits come in several charges. Basic kits for novices generally fee less, while advanced kits with more equipment and functions may be pricier. Consider how much you’re willing to spend, and search for a kit that offers the first-rate fee in your budget.
How to Use a Woodburning Kit
Using a woodburning kit is particularly simple when you understand the fundamentals. Here are the stairs to get started:
Step 1: Set Up Your Workspace
Before you begin, ensure your workspace is easy, organized, and safe. Woodburning tools generate high heat, so you need a non-flammable surface to work on. A warmth-resistant mat or a ceramic tile works well. Ensure your workspace is properly ventilated, as burning timber can launch fumes.
You should have all your materials close by wood, woodburning pen, recommendations, protection gloves, and any additional objects you might want.
Step 2: Select Your Wood
For novices, softwoods like pine or basswood are satisfactory alternatives as they are smooth to burn and permit for higher management. Hardwoods like o.K.Or maple may be used once you benefit extra revel.
If you’re unsure about the wood kind, it’s best to begin with a few small exercise portions before trying large projects.
Step 3: Choose Your Design
Decide what you want to burn on the wood. You can either draw freehand or use a stencil or pattern. For beginners, tracing a design onto the wood with a pencil is a good place to begin. Make sure the design is straightforward at first, as you’ll want to recognize getting the technique proper earlier than diving into elaborate styles.
If you opt for it, you can additionally print out a layout and transfer it onto the wood using carbon paper.
Step 4: Attach the Correct Tip
Woodburning pens include diverse interchangeable recommendations, each providing one-of-a-kind effects. Here’s a brief evaluation of not-unusual hints:
Fine Tip: Great for distinct strains and complicated designs.
Chisel Tip: Best for shading and filling in large regions.
Pointed Tip: Ideal for growing crisp, excellent lines.
Shading Tip: Used to create smooth gradients and texture.
For novices, starting with a fine tip or pointed tip is suggested for outlining your layout.
Step 5: Heat the Woodburning Pen
Plug into your woodburning pen and look forward to it warming up. Most kits take a few minutes to reach the preferred temperature. If your kit has an adjustable temperature dial, begin at a low temperature to get a feel for the pen. You can boom the heat as needed, but be cautious, as better temperatures can burn too deeply and harm the wood.
Step 6: Begin Burning the Design
Now it’s time to begin working on your design. Begin by outlining the pencil markings you’ve made on the wood. Move the pen slowly alongside the traces to create a good burn. Keep the pen in constant motion to avoid making uneven or overly deep marks.
You can adjust the pen’s speed and strain to control the darkness and intensity of the burn. Light strain will create lighter marks, whilst greater pressure will result in darker, deeper burns.
Step 7: Add Shading and Detail
Once you’ve mentioned your design, you may begin adding shading and further details. For shading, use a much broader tip or a shading tip, and move in smooth, managed strokes. Gradually build up layers of shading to create a herbal transition of light and dark areas.
Be an affected person, and don’t forget that it’s better to accumulate shading slowly than to overdo it immediately.
Step 8: Finish the Design
Once you’re happy with your design, cautiously check any regions that need touch-ups or additional details. After completing the burning, let the wood settle down before handling it.
Step 9: Clean Your Tools
Once you’ve finished your assignment, unplug the woodburning pen and permit it to cool down earlier than cleansing. Some pens have detachable tips that you may smooth with a moist cloth or twine brush. Ensure the pen and guidelines are completely cool before cleansing to avoid burns.
Step 10: Optional – Adding Color or Finishing Touches
While woodburning itself creates stunning designs, some artists pick to add color to their paintings using colored pencils, markers, or paints. You can also observe a defensive finish to your project, such as wood varnish or a clear coat, to preserve the design.
Advanced Techniques for Experienced Artists
Once you’ve mastered the basics, you can discover superior techniques to elevate your woodburning tasks. These consist of:
Shading
Shading is one of the most popular strategies in woodburning. To create a clean gradient effect, range the pressure and speed of your pen. Using a shading tip will help create softer, extra-problematic gradients.
Texture Creation
Experiment with unique suggestions to create precise textures. You can create results that mimic timber grain, clouds, or maybe animal fur. Each tip has a different effect, so practice with exceptional ones to achieve the look you want.
Using Color
Some woodburning artists like to add shade to their designs. You can use colored pencils, markers, or even paints to decorate your woodburning tasks. Adding coloration could make your designs pop and give them greater dimension.
Mixed Media Projects
Woodburning can be combined with different artwork forms, such as carving, portraying, or even material art. This opens up endless opportunities for your creativity. Many artists revel in blending woodburning with different techniques to create complicated, multidimensional portions of artwork.
FAQs
1. What is the satisfactory wooden for woodburning?
Softwoods like pine, basswood, and birch are ideal for beginners because they burn more without difficulty. Hardwoods like okay and maple require higher temperatures but offer greater distinctive consequences for skilled artists.
2. Can I use a woodburning kit on different substances besides wood?
Yes, you can use woodburning tools on leather-based, gourds, paper, or even a few fabrics. However, the technique and temperature settings may vary depending on the material.
3. Is it hard to research wood burning?
Woodburning is simple to get started with, but like every artwork shape, it takes practice to grasp. Beginners should start with easy designs and work up to
4. How long does it take to get top wood burning?
The time it takes to get right at woodburning depends on how much you practice. Most novices can create easy designs within a few hours, while more complicated initiatives may take weeks of exercise.
5. What are some common mistakes to avoid in woodburning?
Common mistakes include using too much pressure on the pen, working with a wooden that’s too tough for novices, and no longer allowing enough time for the pen to warm up. Always practice on scrap wood before starting your very last task.
Conclusion
A woodburning kit is a wonderful device for anybody inquisitive about exploring the world of pyrography. Whether you’re a newbie or a skilled artist, the proper tip can open up an international of creative opportunities. Start with simple designs and slowly move on to advanced strategies. With persistence and exercise, you could create beautiful woodburning portions to galvanize friends and family.